1. What is Coinbase?
Coinbase is a larger and most reliable cryptocurrency exchange globally, which was established in 2012 and has offices in San Francisco, California. It has more than 100 million registered users in more than 100 countries and is publicly traded on the NASDAQ stock exchange with a ticker symbol of COIN.
The platform enables users to purchase, sell, hold, transfer and earn cryptocurrency in a safe and controlled space. Coinbase has a variety of products, including: Coinbase (the regular consumer application), Coinbase Advanced Trade (professional traders), Coinbase Wallet (self-custody wallet), and Coinbase Prime (institutional clients).
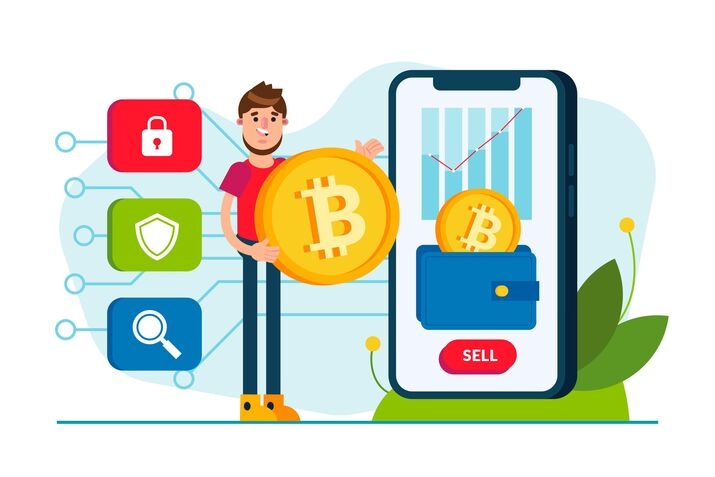
In sending Cryptocurrency, Coinbase offers two main delivery options, sending to a fellow Coinbase user using email or username (free and instant), and sending crypto to an external wallet address on any blockchain network (network fees are incurred).
2. Supported Cryptocurrencies for Sending
Coinbase supports hundreds of cryptocurrencies for transfer. Below are the most commonly sent digital assets along with their respective blockchain networks:
| Cryptocurrency | Symbol | Blockchain Network | Avg. Transfer Time |
|---|---|---|---|
| Bitcoin | BTC | Bitcoin Network | 10 – 60 minutes |
| Ethereum | ETH | Ethereum (ERC-20) | 1 – 5 minutes |
| Solana | SOL | Solana Network | Under 30 seconds |
| USDC | USDC | Ethereum / Polygon / Base | 1 – 5 minutes |
| Litecoin | LTC | Litecoin Network | 2 – 10 minutes |
| XRP | XRP | XRP Ledger | Under 5 seconds |
| Cardano | ADA | Cardano Network | Under 2 minutes |
| Polygon | POL | Polygon Network | Under 1 minute |
| Dogecoin | DOGE | Dogecoin Network | 1 – 5 minutes |
| Avalanche | AVAX | Avalanche C-Chain | Under 2 minutes |
3. Before You Begin: Prerequisites
Before sending cryptocurrency on Coinbase, ensure you have the following in place:
3.1 Account Requirements
- Validated Coinbase account (mail address is verified + phone number)
- KYC done using a government-issued ID.
- There is security with Two-Factor Authentication (2FA).
- Enough money in cryptocurrencies in your Coinbase account.
- Good account with no restrictions or hold.
3.2 Technical Requirements
- Recent update to the Coinbase mobile application (iOS or Android), OR
- A more recent web browser (Chrome, Firefox, Safari, Edge) at coinbase.com.
- Stable internet connection
- Authentication method 2FA (SMS, Google Authenticator, or Yubikey)
3.3 Information you will require as the recipient
In the case of Coinbase-to-Coinbase: Recipient email address, phone number or Coinbase username.
- In case of external wallet: complete recipient wallet address on the proper network.
- In the case of the XRP or Stellar: It also needs a destination tag or memo.
- In case of ENS supported wallets: the domain name of .eth is used as a recipient address.
4. Procedure 1: Cryptocurrency transfers through the Coinbase Mobile App
The most convenient method of sending a cryptocurrency is through the Coinbase mobile application. The app is available on both iOS and Android, which enables a simplified interface to facilitate fast and safe transfers.
Free and instant transfer to another Coinbase user
- Sending crypto to the other user of Coinbase is totally free and is instantly processed, irrespective of the quantity.
- There are no network charges on this kind of transfer.
Step 1: Launch the Coinbase App
Launch the Coinbase application. Login with your PIN, or Face ID or fingerprint identification.
Step 2: Tap the Send Button
Then, on the home screen, tap on the Send icon on the bottom of the screen. On others, it is located at the Pay tab.
Step 3: Choose the Cryptocurrency
A list of your assets will be shown. Tap the currency you wish to transfer, i.e. Bitcoin (BTC) or Ethereum (ETH). It is possible to send only assets that have a balance of more than zero.
Step 4: Enter the Amount
Write how much you would like to send. By tapping the switch icon beside the amount field, you can switch between the USD and the amount of cryptocurrency.
Step 5: Recipient Details
The To field should contain the email address, telephone number, or name of the recipient in Coinbase. Coinbase will automatically verify whether the recipient is a Coinbase user and the send will be free and instant.
Step 6: Add an Optional Note
You may add a quick note to your transaction like: Splitting the dinner bill. This is optional yet it may be handy in record keeping.
Step 7: Preview the Transaction
Tap Preview Send. Check everything thoroughly: recipient, asset, amount and fees. In the case of Coinbase-to-Coinbase transfer, the charge will appear as zero.
Step 8: Authenticate with Security Check
Tap Send Now. Coinbase can also challenge you with biometric, PIN, or an authenticator code. Observe full verification in order to sanction the transaction.
Step 9: Transaction Complete
The confirmation screen will be displayed and will have a transaction ID. The recipient will get the crypto in his or her Coinbase account immediately, and both parties get an email notification.
4.2 Send to an External Wallet Address
This option is used when sending crypto to a wallet that is external to Coinbase like MetaMask, Trust Wallet, Ledger, Trezor, or another exchange. External transfers attract network (gas) fees.
Step 1: Tap on Coinbase App and Tap on send
Open the application, log in and tap the Send icon either on the home screen or the navigation menu.
Step 2: Choose Your Asset
Choose the currency of your transfer. Make sure you get sufficient balance to make the network fee and transfer amount.
Step 3: Enter the Amount
Enter the volume of what you wish to send. Send all the balance if you wish to send Tap Max. The application will automatically reduce network fees out of the maximum amount.
Step 4: Type in External Wallet Address
Paste the external wallet address in the To field or tap on the QR code icon to scan the wallet QR code of the recipient in the To field. Coinbase would display a warning sign in case the address is not linked to a Coinbase account.
Step 5: Choose the right Network
When dealing with assets existing across several networks e.g. USDC on Ethereum, Polygon, or Solana, you have to choose the right network that fits the wallet of the receiver. Sending through different network will lead to loss of money.
Step 6: Review Network Fees
The estimated network fee will be presented in both crypto and USD at Coinbase. In the case of Bitcoin, the fees depend on the congestion of blockchains. With Ethereum, gas costs may be very high or very low. You can encounter Slow, Standard and Fast fee.
Step 7: Preview and Review
Tap Preview Send and ensure you carefully check out the entire wallet address, network of choice, amount to send and the network fee. Make sure that everything is right.
Step 8: Authorize the Transfer
Tap Send Now. Finalize the 2FA or biometric authentication. Their transaction is then sent to the blockchain.
Step 9: Track the Transaction
You shall get an ID number (TxID). This may be tracked on a blockchain explorer like Etherscan, Blockchain.com, or Solscan.
5. Method 2: Sending Crypto via the Coinbase Website
Coinbase web interface at coinbase.com provides the same functionality as the mobile application with the added feature of a larger screen, thus being comfortable to desktop users and users with larger transactions to handle.
5.1 Step-by-Step: Web Browser Approach
Step 1: Open Coinbase Web site
Open your browser and visit www.coinbase.com. Click on Sign In in the upper left-hand corner, then press the email and password.
Step 2: Make 2FA Verifications
Coinbase will require you to authenticate your identity using SMS code, Google Authenticator, or hardware security key. Enter the code to proceed.
Step 3: Access Your Portfolio
After logging in, you will have your portfolio dashboard that displays all your balance of cryptocurrencies and their current value.
Step 4: Select the Asset to Send
You can select the cryptocurrency you wish to send out of your portfolio. This brings you to the asset detail page displaying your balance, price chart and history.
Step 5: Click the Send Button
On the asset page, select the blue send button. A send dialog box will appear.
Step 6: Fill in the Send Form
Enter recipient email/ username (coinbase users) or wallet address ( external wallets) Input the sum to send in cryptocurrency or USD. Provided there is a correct network, choose it.
Step 7: Check the details of the transaction.
Click Continue, or Preview Send. All the details (amount, recipient address, network, and fee) will be displayed in a summary screen. Review carefully.
Step 8: Finalize the Deal
Click Send Now. You can be requested to authenticate through email link, SMS code or authenticator app. Authenticate within time duration.
Step 9: Save Your Transaction Record
Having done so, record your Transaction ID. The transaction will be available any time in your Transaction History under the Assets tab.
6. Method 3: Transferring through Coinbase Wallet (Self-Custody)
Coinbase Wallet is a different application to Coinbase. It is a self-custody wallet i.e. you have your own personal keys, and Coinbase does not know anything about your funds. It is the approach that is suggested to users of DeFi, NFT traders, and individuals who desire to have complete control over their assets.
6.1 Coinbase vs. Coinbase Wallet: Key Differences
| Feature | Coinbase Exchange | Coinbase Wallet |
|---|---|---|
| Custody | Coinbase holds keys | You hold private keys |
| Account Required | Yes (email + KYC) | No account needed |
| Free Coinbase Sends | Yes | No — fees always apply |
| DeFi and dApp Access | No | Yes — full access |
| NFT Support | Limited | Full support |
| Recovery Method | Email and password | 12-word seed phrase |
| Best For | Beginners, trading | Advanced users, DeFi |
6.2 How to Send from Coinbase Wallet
Step 1: Install Coinbase wallet:
Install the Coinbase Wallet app (not to be confused with Coinbase) to the App Store or Google Play. Install it using your 12-word recovery phrase or make a new wallet.
Step 2: Make Sure You Have Money and Gas.
Sell Coinbase exchange to your Coinbase Wallet address. A small amount of the native token of the network is also required to pay gas fees, such as ETH to pay with Ethereum-based tokens.
Step 3: Tap Send on the Home Screen
On the Coinbase wallet home page, tap the Send button.
Step 4: Asset and Network selection
Select the blockchain network and an asset. This is particularly significant concerning the case of multi-chain resources such as the USDC, which is present on Ethereum, Base, Polygon, Solana and others.
Step 5: Type Address or ENS of recipient
Insert the recipient wallet address, read their QR code or manually input their ENS domain name like alice.eth. The wallet will issue the ENS to the actual address.
Step 6: Set Amount and Gas Fee
Enter the amount to send. The wallet will approximate gas expenses. You can even tune the price of gas to higher gas implies speedy confirmation.
Step 7: Review and Send
Check all the transactions in the confirmation screen. Tap Confirm and Biometrics or PIN authentication (when asked).
Step 8: Track on Blockchain Explorer
After sending, go to your history and tap the transaction to view it on the corresponding blockchain explorer and keep track of whether it has been confirmed.
7. Learning about Coinbase Transaction Fees
Knowledge of fees is the key to low-cost cryptocurrency transfer. There are two situations where Coinbase levies fees, the charges on their own platform, and the charges on the blockchain network.
7.1 Coinbase Platform Fees
| Transaction Type | Fee | Notes |
|---|---|---|
| Send to Coinbase User | Free | Instant, no network fee |
| Send to External Wallet | Network fee only | Coinbase charges no extra fee |
| Buying Crypto (simple) | 1.49% to 3.99% | Varies by payment method |
| Selling Crypto (simple) | 1.49% to 3.99% | Varies by payment method |
| Advanced Trade (maker) | 0% to 0.40% | Volume-based tier pricing |
| Advanced Trade (taker) | 0.05% to 0.60% | Volume-based tier pricing |
| Coinbase One Subscription | $29.99 per month | Zero trading fees for members |
7.2 Blockchain Network Fees
Network fees are paid to blockchain validators and miners, not to Coinbase. These fees vary based on network congestion and are entirely outside Coinbase’s control.
| Network | Typical Fee Range | Fee Paid In | Speed |
|---|---|---|---|
| Bitcoin | $1 to $50+ | BTC (satoshis) | 10 to 60 min |
| Ethereum | $0.50 to $30+ | ETH (gwei) | 1 to 5 min |
| Solana | Less than $0.01 | SOL | Under 30 sec |
| Polygon | Less than $0.01 | POL | Under 1 min |
| XRP Ledger | Around $0.0002 | XRP (drops) | Under 5 sec |
| Base (L2) | Around $0.01 | ETH | 1 to 2 min |
| Litecoin | $0.01 to $0.10 | LTC | 2 to 10 min |
8. Security Best Practices
Security is the most important aspect of sending cryptocurrency. Follow these best practices to protect your funds at all times.
8.1. Always Check the Wallet Address
- Never Disregard the Wallet Address.
- Do not handwrite wallet addresses. Always copy and paste.
- Once it is pasted visually confirm at least the first 6 and final 6 characters of the address.
- |human|>Watch out clipboard hijacking malware which silently overwrites an address that has been copied with an attackers address.
- In case of large transactions, first send a small amount of money first and then send the rest.
8.2. Enhance the Security of Your account on Coinbase
- Prefer Google Authenticator or a hardware security key (Yubikey) to SMS in 2FA.
- Turn on Coinbase Vault on large holdings, and this creates a 48-hour withdrawal time.
- Periodically review related applications and live API keys on your Security Settings.
- Do not under any condition share your password, 2FA codes, or seed phrase with any third party.
8.3 Identifying These Cryptocurrency Scams
- Fraudulent Coinbase support representatives through email, telephone or social media requesting account access.
- Cryptocurrency giveaway scams which claim that they will multiply your coins first.
- False websites that look aesthetically similar to coinbase.com. Never trust the URL.
- Pig butchering frauds on counterfeit online relationships resulting to unscrupulous investment sites.
9. Troubleshooting Common Issues
Problem 1: Send Button is Greying out or not available
- Reason: Account has not been completely verified, account has been limited, or a new password or 2FA has been used, which has caused a temporary block on withdrawals.
- Resolution: Full identity checking in Settings Security. Look in your email, do you have restrictions? Wait 24- 48 hours since the last security change attempt before trying to send.
Problem 2: Transaction is Stale or taking a Long Time
- Reason: Network congestion in Bitcoin can result in hours or even day long delays. Unstable gas values on Ethereum may cause a stuck transaction.
- Resolution: Visit the blockchain explorer with your Transaction ID. In the case of Bitcoin, Replace by Fee (RBF) is available through Coinbase Wallet. In the case of the Ethereum in Coinbase Wallet, the Speed Up transaction option is used to retransmit with a higher gas fee.
Season 3, episode 1: Crypto Sent to the Wrong Address
- Reason: There was a mistake in the address, I chose the wrong network or pasted an incorrect address.
- Solution: The transactions made by blockchain cannot be reversed. When sent to an incorrect address you own across another network, you will potentially have the opportunity to retrieve any money by importing the private key into a wallet that is compatible. When sent to an unknown address, the funds are lost forever. Call Coinbase support, and recovery is not possible in the majority.
Issue 4: Destination Tag of XRP or Stellar is missing
- Reason: XRP and Stellar have to include a destination tag or memo in order to send to exchanges. It is without it the receiving exchange cannot credit your account.
- Remedy: It is always good to have the destination tag or memo. Also see the support of the receiving exchange immediately with your Transaction Hash in case you were able to send without a memo because some exchanges manually credit funds within a specified period of time.
Issue 5: 2FA Checking Failure
- Reason: Time synch problem with authenticator app, wrong number to send a text, or lost access to 2FA device.
- Remedy: Configure your gadget clock with TOTP authenticators. In case the 2FA access was lost, use the backup codes that were stored in the course of the set up. In case you do not have backup codes, leave a message to Coinbase support to start an account recovery process that involves identity re-check and can take several days to complete.
10. Tax Implications of Sending Cryptocurrency
In most jurisdictions including the United States, cryptocurrency is treated as property for tax purposes. Certain transactions may be taxable events.
| Transaction Type | Taxable? | Notes |
|---|---|---|
| Send to your own wallet | No (USA) | Not a taxable event if you own both wallets |
| Send as a gift | Possibly | Gifts over $18,000 per year may trigger gift tax in the USA |
| Send as payment for goods/services | Yes | Treated as a sale at current fair market value |
| Donating crypto to charity | No (USA) | May qualify as a charitable tax deduction |
| Converting one crypto to another | Yes | Treated as a sale and new purchase |
| Selling crypto to fiat (USD) | Yes | Capital gains tax applies based on holding period |
11. Expert Tips for Efficient Crypto Transfers
Apply Base or Polygon to Low-Cost Transfers
To send USDC stablecoin, you must select the Base or Polygon networks over Ethereum mainnet. The charges are as cheap as 0.01 in comparison to several dollars in Ethereum mainnet.
Submit Batches to Reduce Expenditures
Every transaction has a different network cost. When making several transactions to the same party, group them into one transaction to ensure you pay the least.
Time Your Ethereum Transactions
Ether gas costs are minimal during weekends and during the US night. Send only after checking out the current gas prices using such tools like Etherscan Gas Tracker.
Use the Max Button Carefully
With a Tapping Max, you transfer your remaining bank balance (minus fees). Caution with tokens that will incur gas-fees in a different asset. As an example, when sending all your USDC on Ethereum you also need some ETH to cover the gas fee so make sure to keep some ETH in your wallet.
Keep Accounts of Every Deal
Get a CSV version of your transaction history at Coinbase on a regular basis. This is necessary to report tax and settle disputes.
Large Holdings should be used with Coinbase Vault
Coinbase Vault is an additional security measure that is applied to assets of very large size, such as the use of multi-approval, and a 48-hour withdrawal delay period has been implemented, to prevent unauthorized access.
12. Conclusion
Transferring cryptocurrency in Coinbase is very simple and safe when you are conversant with the types of available methods and best practices. Whether you are sending to a friend in their Coinsbase account at no charge, moving to an external wallet, or you are using Coinbase Wallet to access DeFi activities, the platform provides various options to get to various needs and experience levels.
The three principles that should be adhered to are as follows: in the first place, when addressing a recipient, always check the recipient address several times, use the correct blockchain network, and do not share your login credentials or your seed phrase with anyone. With the help of these steps that are mentioned in this guide, it is possible to make transfers in the cryptocurrency world and be sure of its safety and the absence of any money loss.
Each time the cryptocurrency market is changing, Coinbase upgrades its functions, networks, and charges as well. The Help Center has the most up-to-date information available at help.coinbase.com at all times.